As a responsible pet owner, it’s crucial to pay attention to your dog’s overall health and well-being. One area that often requires regular maintenance is their ears. Proper ear cleaning is essential for preventing infections and discomfort in your canine companion. In this comprehensive step-by-step guide, we will walk you through the process of dog ear cleaning, ensuring you have the knowledge and confidence to keep your furry friend’s ears healthy and clean.
Gather the Necessary Supplies
Before starting the ear cleaning process, gather all the supplies you’ll need. These include:
- Dog ear cleaning solution (preferably recommended by your veterinarian)
- Cotton balls or gauze pads
- Towels or tissues
- Treats as a reward for your dog’s cooperation
Observe Your Dog’s Ears
Take a moment to observe your dog’s ears before cleaning them. Look for any signs of redness, discharge, swelling, or foul odor. If you notice any of these symptoms, it’s advisable to consult your veterinarian before proceeding with the cleaning.
Create a Calm and Comfortable Environment
Find a quiet and comfortable space for your dog where they can relax during the ear cleaning process. Make sure to eliminate any potential distractions that could make them anxious or uncooperative.
Begin the Cleaning Process
Now that you have everything prepared, it’s time to clean your dog’s ears:
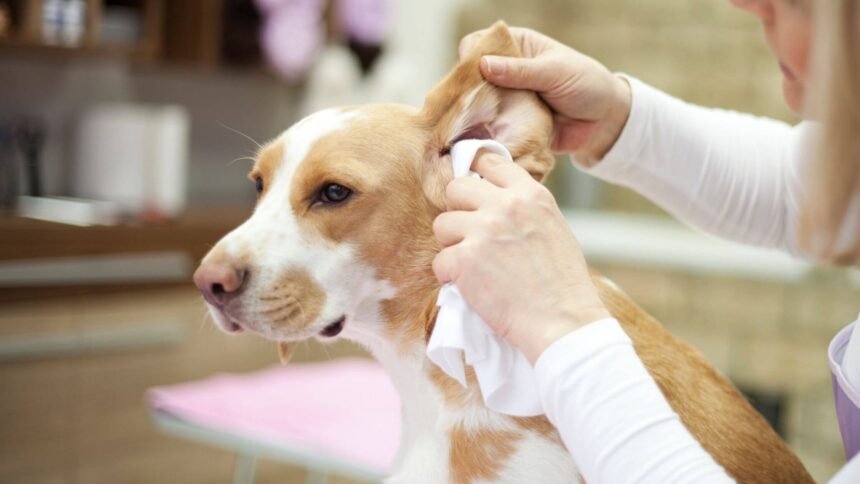
- Start by gently holding your dog’s head and tilting it to one side. This position will make it easier for you to access the ear canal.
- Take a cotton ball or gauze pad and soak it with the ear cleaning solution. Squeeze out any excess liquid to avoid dripping.
- Using your fingers, carefully lift the outer part of your dog’s ear to expose the ear canal.
- Gently wipe the visible parts of the ear canal with the dampened cotton ball or gauze pad. Be cautious not to push the debris further into the ear.
- Never use cotton swabs or insert anything into the ear canal, as it can damage the eardrum.
- If your dog’s ears are excessively dirty, repeat the process with fresh cotton balls or gauze pads until they come out clean.
Dry the Ears
After cleaning, it’s essential to dry your dog’s ears to prevent moisture buildup, which can lead to infections. Use a dry cotton ball or towel to gently pat the ears dry.
Reward Your Dog
To positively reinforce the ear cleaning experience, reward your dog with treats and praise. This will help create a positive association with the process and make future cleanings easier.
Establish a Routine
Regular ear cleaning should be part of your dog’s grooming routine. The frequency may vary depending on the breed and your veterinarian’s recommendations. Some dogs with healthy ears may only need cleaning once a month, while others may require more frequent cleanings.
Monitor for Signs of Infection
Even with regular cleaning, it’s crucial to monitor your dog’s ears for signs of infection. Watch out for persistent redness, swelling, discharge, foul odor, or if your dog frequently scratches or shakes their head. If you notice any of these symptoms, consult your veterinarian promptly.
Proper ear cleaning is an essential aspect of maintaining your dog’s health and well-being. By following this comprehensive step-by-step guide, you can ensure that your dog’s ears remain clean and free from infections. Remember, if you have any concerns or notice any signs of ear problems, it’s always best to consult with your veterinarian.


